PostsAboutGames
All posts tagged with programming

"Some Tank Game" - A game implemented in Rust using the Bevy engine

July 05, 2021 - Søren Alsbjerg Hørup

I Finished my first Rust Game - called “Some Tank Game”!

Source can be found here: https://github.com/horup/some-tank-game-rs

The aim of the project was to implement a full game (albeit a simple one) using Rust and using the Bevy game engine.

Why? More or less to prove my gut feeling that Rust is a great programming language to make computer games and that Bevy is an awesome engine with a lot of potential.

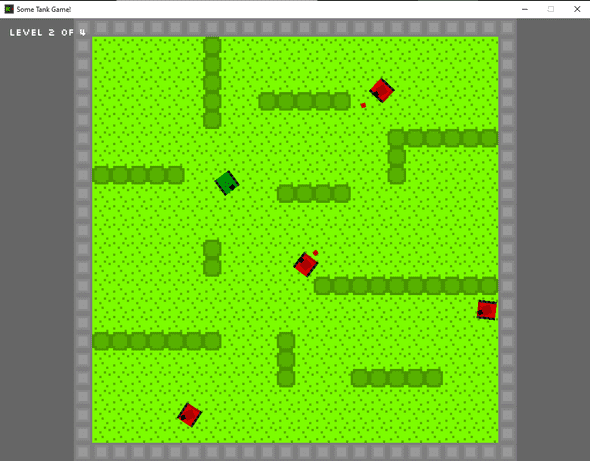
The game I implemented is nothing fancy, just a simple top down shooter. The game features four levels, pixel-art graphics, random collected sfx and music by Zander Noriega.

For fun, I tracked every hour I spent implementing the game, including play-testing, debugging, asset drawing, sfx searching, etc.

I started development the 27. of march and finished version 1.0 in the 2. of July. About 3 months of calendar development time. In this interval, I spent 65 hours in total or about 1 hour a day implementing the game.

I quickly got Bevy up and running and was able to draw some sprites. Bevy did not have tilemap support, so I implemented my own tilemap plugin which can render a tilemap consisting of many sprites batched into a mesh.

Bevys plugin system is really easy to work with. Simply define a struct and implement the Plugin trait and one can insert new resources, systems, etc. into Bevy.

The Entity Component System of Bevy is very non-verbose and easy to work with. Any struct (as far as I know) can be made into a component. Systems are implemented as plain functions and can be ‘wrapped’ as a system type for bevy to consume simply by calling <function name>.system(). This operation will fail at compile time if the function cannot be used as a system in Bevy, e.g. if it’s signature does not match the signature of supported functions. Systems run in concurrently and locking of resources are automatically handled. Great!

For the game I needed a collision detection and handling system. Bevy does not provide this out of the box, but due to the plugin friendly nature of Bevy, I quickly found a crate, bevy_rapier2d, that provides collision detection and response directly into the engine using rapier specific components and resources. Integration of this was a breeze! especially compared to implementing my own custom collision detection and handling systems.

For level editing, I used the excellent Tiled editor to construct my levels. Bevy does not support Tiled out of the box, but I found the tiled crate which provides generic Tiled support in Rust. I wrapped tiled in my own asset loader and ‘bam!’ I had Tiled support in Bevy. I later learned that bevy_tiled exists, which more or less does what I implemented - but hey, one less dependency :-)

Another awesome feature with Bevy is the build speed. By default, Bevy and the application compiles into a single ‘fat’ executable. This takes several seconds. However, Bevy also provides the ability to dynamically link to Bevy which reduces the compile times significantly.

I spent a lot of time getting Bevy UI to do want I wanted, specifically to render text in the correct positions and with the correct ordering. For a future projects I think I will opt-out of Bevy UI and instead use an immediate mode API such as egui through the use of the bevy_egui crate.

For sound and music playback I initially went with what was readily available in Bevy, which is more or less a single audio channel and the ability to schedule a wave, mp3 or ogg file to be played. However, I quickly realized that I needed the ability to loop music and also stop and restart a music track whenever a level ended either through a win or a loss. I found the bevy_kira_audio plugin which more or less replaces audio part of Bevy with the kira crate.

Lastly, I created a simple installer using Inno Setup which bundles my assets and executable into a self-extracting installer.

All in all, a fun project with the following post-project reflections:

  • Rust is an awesome programming language for Gamedev.
  • Bevy is an awesome engine for Gamedev currently only lacking in web support and maturity.

Next steps is to see if I can port the game to HTML5, which is one of the goals of the Bevy engine (although still in progress and not yet realized as far as I can see).
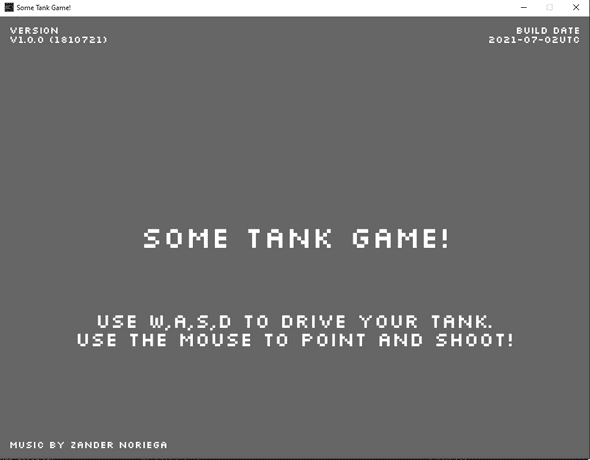
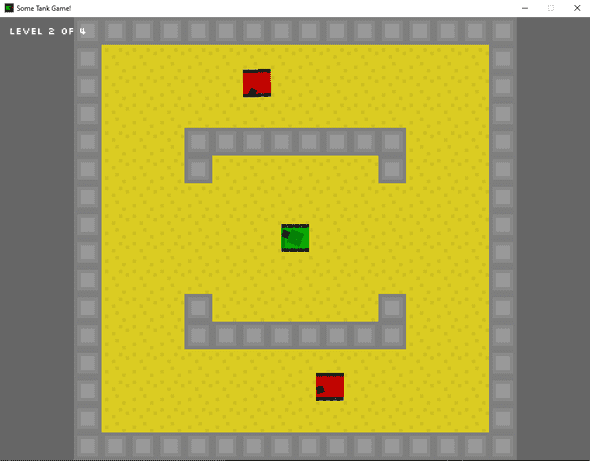
some tank game screenshot 1

some tank game screenshot 2

some tank game screenshot 3

Bevy - A Rust Game Engine

March 29, 2021 - Søren Alsbjerg Hørup

In the past months I have been focusing on using the Rust programming language in relation to game development.

I wanted a setup where I could implement a game that could build for both native, such as Microsoft Windows, and WASM, targeting modern browsers such as Chrome.

To achieve this I have been working on a pet project called Blueprint. Intention with Blueprint was to create a Rust template that could be quickly generated using cargo-generate and that provided several features out of the box. Features included:

  • 2d and 3d rendering.
  • many thousands of sprites using VBO batching.
  • entity component setup using Hecs.
  • pre-defined systems such as movement system, physics systems.
  • multiple template games such as platformer, shooter, etc.

My primary motivation was a template where I could quickly prototype game ideas using Rust. Previously I have been using Typescript + PIXI.js or THREE.js. But since I am a huge Rust fanatic, I wanted to see if I could conjure up a similar setup using Rust + libraries such as winit, wasm-bindgen, glow, etc.

Recently however, I stumbled upon Bevy, a data driven game engine written in Rust. Bevy more or less ticks all the boxes above, except for WASM support. I want to build my games such that they can be quickly shared in the browser for other to see, thus WASM is a non-optional thing.

However, it seems that WASM support is a focus area of Bevy and it seems it is currently possible to run Bevy in the browser using webgl plugins, atleast if one uses the master branch of github and not version 0.4 currently published on crates.io.

In any case. I have decided to put my own Blueprint project on hold and fiddle a bit with Bevy before continuing down a path which seems to be well underway by the community!

If all goes well, I can ditch my efforts on my own brewed Blueprint and make a Bevy template!

Migrated to Gatsby

May 21, 2020 - Søren Alsbjerg Hørup

I initially started this blog the 3rd of January 2017 on WordPress.com, which is a hosted / SaaS / platform of the open source WordPress CMS: https://en.wikipedia.org/wiki/WordPress.com I just needed a place to blog, nothing more and nothing less, with no clear requirements on plugins, speed nor look and feel.

Early 2020, I heard about GatsbyJS from one of our DevOps consultants, a static site generator that leverages React to generate “blazing fast sites”. GatsbyJS sources data from one or more data sources, transforms the data, exposes the data through GraphQL and generates one or more webpages using server side React that can be deployed to CDNs (Content Delivery Networks) such as Netlify, GitHub Pages, or any web server that can serve static files. In addition, the static pages are ‘rehydrated’ after rendering in the browser, allowing React to be used in the DOM even though the site is pre-rendered and served as ‘static’ files.

This has many benefits:

  • Serving HTML directly to the browser via a CDN is very cost-efficient, due to the distributed nature of CDNs and due to the static files being static and thus highly cache-able. This is harder to achieve when using server side generated pages, since a server is responsible for generating the pages upon requests from a browser.

  • The browser can ‘stream the resources into the DOM’ while downloading, to provide an early partial rendering of the page. This makes the speed of the website seem very fast, since the DOM is changing the moment the user enters the site. SPAs (Single Page Applications), such as many React apps, typically lack this behavior since they need to download a JavaScript bundle, manipulate the DOM and then display the resulting page, which can easily take a few seconds.

  • Compared to a SPA, since the page is statically generated, the initial DOM is contained in the HTML files and thus easier for Google and other search engines to traverse, increasing the ‘SEO Score’ of the site.

  • Dependent resources, such as images, can be transformed before being outputted to fit the generated page, e.g. a 4K image can be transformed to fit the 800px of a div without requiring manual image manipulation software.

There are drawbacks as well:

  • Since the site is ‘static’ no dynamic behavior from the server can be achieved, only DOM manipulation from a client side library such as React can change the page after initial rendering. GatsbyJS uses the re-hydrate feature of React to enable ReactDOM after the initial page rendering, but if the site is primarily consuming a data source which is server side, such as an SQL data source, React in the browser has no chance of consuming this and can thus not update the site.

  • Updating the site with new changes to the server side data sources requires a rebuild of the site and upload of all the static resources. This can easily take minutes when doing a big site, meaning that content update is not visible to the user before a new deployment (like the good old days :-P)

  • If using CDNs, there can be a delay between the upload of the site and the propagation through the network.

In any case, May the 11th I started migrating from WordPress.com to a ‘Gatsby generated site’. To achieve this, I had to do several things:

  • I needed to export and import all my WordPress blogs into a format GatsbyJS could understand. GatsbyJS can source data from Markdown and transform this into HTML, so I decided to leverage this functionality and convert all blog posts into Markdown using a mixture of homebrew and standard tools (a blog post on its own)

  • I needed to implement the blog using React and hookup the markdown data source. Luckily for me, the blog starter provided this out of the box: https://www.gatsbyjs.org/starters/gatsbyjs/gatsby-starter-blog/ and I could simply copy and paste :-)

  • I needed to implement tag support, since this was not provided by the blog starter and my WordPress site uses tags.I had to extend the markdown with tags and extend the gatsby-node.js file such that ‘tag pages’ could be generated. (also a post on its own)

  • I wanted a look and feel similar to my WordPress site, so I made several smaller adjustments to the way the site was generated, with the primary adjustment being that all posts are served from /index.html including the content of the blog posts. Lucky me, the blog starter do lazy loading of all images so I simply output all blog posts without issues. This might not scale when I have 1000+ posts, but hey! that’s a problem for a future time.

  • I needed a simple way to update my site with new blog posts. A bit of googling and I found Netlify-CMS, an open source SPA that can be embedded into a site and be used to read and write markdown directly into GIT. (also a post of its own)

  • I needed a place to put my generated site. Initially I had chosen Github, but with the googling of Netlify-CMS I decided to tryout Netlify and host my site there.

  • Lastly, I needed to redirect my routes such that when I point Deepstacker.com to Netlify, Google gets a 301 in its face when asking for paths from the old WordPress site. Netlify supports the writing of a _redirects file, where one can redirect from X to Y, making it easy to enforce a redirect from the WordPress format to the new Gatsby format.

That’s it! My Gatsby blog is now alive.

Stuff I still need to do:

  • Fix some conversion errors in the old blog posts
  • Add the ‘about me’ page, which I have not yet moved from WordPress.
  • Improve look and feel a bit more after getting some feedback.
  • Improve SEO
  • Analyze the speed of the site and fix potential bottlenecks.

TypeScript Readonly and Pick

April 28, 2019 - Søren Alsbjerg Hørup

An awesome feature of TypeScript is the ability to generate inferred types. C# supports this feature only for anonymous types, e.g.:

 var t = new { A = 1, B = "b" };

Creates a new object with an anonymous type having two members: A and B.

Similar can be done in TypeScript:

let t = {a:1, b:"b"};

Where t is also an anonymous type having two members: a and b.

TypeScript provides many advanced typing features that can be used to increase type safety.

An example are built-in generics such as Readonly and Pick.

Readonly is pretty simple, it takes a type and returns a new type where all properties are read only. Example:

let t = {a:1, b:"b"};
t.a = 2; // OK.

function makeReadonly<T>(t:T):Readonly<T>
{
   return t;
}

let tt = makeReadonly(t);
tt.a = 2; // not OK

The makeReadonly function simply takes a value of type T and returns the same value but changing its type to Readonly. This throws and error at compile time, thus stopping us from mutation the properties of the object.

Another great built-in generic is Pick. Pick allows us to construct a new type based upon the properties of another type.

Consider the following unsafe example, where we have a pick function that takes an object and returns a new object with only a single property taken from the original object.

let t = {a:1, b:"b"};
function pick<T>(t:T, property:string)
{
   let o = {} as any;
   o\[property\] = t\[property\];
   return o;
}
let o = pick(t, 'c'); // compiles, but c is undefined

Compiles but will fail at run-time since ‘c’ is not defined. This can be made much more type secure by introducing another generic K, which is a set of the keys of the object:

let t = {a:1, b:"b"};
function pick<T, K extends keyof T>(t:T, property:K)
{
   let o = {} as T;
   o\[property\] = t\[property\];
   return o;
}
let o = pick(t, 'c'); // no longer compiles!

Since c is not defined in T, the compiler throws an error. However, type safety is still not guarantee 100%. Consider this example:

let o = pick(t, 'a'); // compiles as expected.
let b = o.b;          // compiles, but b is not defined!

Since we picked ‘a’ from T, the compiler is OK on line 1. The compiler is also OK at line 2, since ‘b’ is defined in type T. However, this will fail at run-time due to ‘b’ not being defined. This can be fixed by using Pick!

let t = {a:1, b:"b"};
function pick<T, K extends keyof T>(t:T, property:K):Pick<T, K>
{
   let o = {} as Pick<T, K>;
   o\[property\] = t\[property\];
   return o;
}
let o = pick(t, 'a'); // compiles as expected.
let b = o.b;          // no longer compiles!

With the introduction of Pick, the function now returns a new Type containing a subset of type T. In the example above, we picked ‘a’ and thus generated a new type containing only ‘a’. The last nine now throws an error at compile time, since ‘b’ is no longer defined.

Using these built-in generics can in the end safe the day, with the added benefit of providing improved intellisense.

Apache Thrift - not a replacement for Protobuf *yet*

April 23, 2019 - Søren Alsbjerg Hørup

I frequently need to share typed structures between applications, such as between an ASP.NET C# Backend and an Typescript React single page application.

For this, I have used Google’s protobuf, a binary serialization library.

In protobuf, one defines the intended information in .proto files and uses a Protobuf compiler to auto generate language specific source files.

syntax = “proto3”; message Position { float x = 1; float y = 2; }

Here I define a message called Position, containing two simples float values: x and y. 1 and 2 denotes the order of which the fields appear during the serialization process - for backward compatibility reasons changing the name is allowed but changing the numbers are not since this will change the order on the wire!

Using a Protobuf compiler, such as protoc, language specific versions of the messages can be generated to fit the required language. For C#, the message above results in a class called Position with public Properties called X and Y, including several serialization methods and Properties such as WriteTo, MergeFrom and Parser.

For the web, protobufjs exists, which is a protobuf compiler implemented in JavaScript. This compiler can generate JavaScript and TypeScript source files to be consumed both in node.js and in the browser. I typically generate files for node.js and use a bundler such as parcel-bundler or webpack to bundle for the browser.

This provides binary transport of my messages from backend to frontend, with type security - very nice indeed.

Lately, I have looked into Apache Thrift, which is very similar to Protobuf but with support for many more programming languages out of the box, and with the added bonus of also supporting Remote Procedure Calls (RPC) . (although RPC can be achieved in Protobuf using gRPC)

The syntax of Thrift messages are very similar to Protobuf, the same message above would be written as:

struct Position { 1: double x, 2: double y }

Note: floats are not supported by Thrift, only doubles.

Looking at the supported languages, it seems to dwarf that of protoc (the default compiler of Protobuf) - with support for nearly 30 languages of the the box. Very nice indeed.

C# and TypeScript is also supported, making the Thrift a prime candidate for my typical needs. However, diving a bit deeper into what support means, it quickly shows that not all languages are equally supported, this includes TypeScript.

Generating browser compatible TypeScript that supports binary serialization is not supported. Node.js compatible TypeScript can be generated that supports binary serialization, but this generated code cannot be consumed by bundlers such as WebPack or Parcel Bundler. RPC is also not supported in the browser, although not required for the project in which I decided to test out Thrift.

Looking through NPM, I found “browser-thrift” - a patched version of node thrift that can be consumed by bundlers, only requiring that require(‘thrift’) is replaced with require(‘browser-thrift’) in generated thrift code.

After a few tries, I never got this approach to work and reverted back to using Protobuf.

Summary: Binary serialization is not natively supported by Thrift in the browser - making Protobuf the obvious choice until this is implemented in Thrift.

Parcel-Bundler

May 01, 2018 - Søren Alsbjerg Hørup

Parcel-bundler is a zero configuration web application bundler similar to webpack. It sports multicore compilation and filesystem cache for faster build times, with out of the box support for the most common file types.

Setting up a project using Parcel-Bundler for TypeScript + React is a piece of cake.

Simply create an index.html file which references the index.tsx file directly and invoking the following command from cmd:

parcel index.html

and we are off!

Build wise, parcel will automatically use index.html as entry-point, invoke the TSC compiler for the TypeScript source and include referenced CSS files in the build.

In addition, it will automatically host the bundle on port 1234 and do hot replacement upon changes to the underlying source.

Build wise, it is about twice as fast compared to webpack on my Quad core while sporting even faster build times during incremental builds.

Parcel-Bundler will definitely replace my use of Webpack on most of my projects.

Nativefier

February 15, 2018 - Søren Alsbjerg Hørup

I stumbled upon a cool tool named Nativefier which converts a website into a desktop application, i.e. wrapping it in an executable. Can be installed from NPM and invoked like so:

npm install nativefier -g nativefier somewebsite.com

This downloads all resources from the URL and wraps these in an Electron application which can be distributed.

The resulting application is however a bit fat, easily consuming 90MB of storage. This is primarily due to Chromium and NodeJS being a part of Electron.

Recharts vs Chart.JS

November 20, 2017 - Søren Alsbjerg Hørup

For my latest project I required about 50 x 250px x 250px charts on one page. Initially, I used Recharts because it looks freaking great and integrates nicely with React.

I quickly realized however that Recharts does not scale well because it is DOM heavy. For my applicaiton I quickly reached 12,000 DOM nodes. Loading performance is pretty bad when so many DOM elements needs to be initialized - however, the performance when initialized is actually OK.

In any case, I replaced Recharts with Chart.JS and saw a big performance improvement. My DOM nodes were reduced from 12,000 nodes to about 2000 nodes. Loading time was substantially improved and the performance of the application feels much better.

The biggest difference between the two charting components isthat Recharts is implemented using SVG elements while Chart.JS is implemented using a 2D canvas. The canvas only requires a single DOM node, while SVG requires several DOM nodes for data, chart configuration, etc.

In any case, for chart heavy applications with many charts, Chart.JS is my charting component of choice.

VSCode 1.14 and tasks

August 15, 2017 - Søren Alsbjerg Hørup

I recently started a new Electron Typescript project using version 1.14 of VSCode. Getting the task runner up and running using CTRL+B did not initially work, due to the fact that tasks.json is auto-generated as version 2.0.0 compared to version 0.1.0 which was the default in VSCode 1.13.

In addition, the new VSCode supports task auto-detection which confused the hell out of me due to it detecting tsconfig.json and asking me if I wanted to compile some typescript, even though my Tasks.json file was not yet created.

Apparently, MS added task-auto detection to the mainline during my vacation rendering tasks.json as an optionel part of a VSCode project. tasks.json is still required if one wish to create custom tasks or scan and parse the auto-detected tasks shell output.

This feature is great! since now I can make all my tasks in NPM without having to re-define them in tasks.json. VSCode can now detect these tasks automagically.

2017-08-15_08-53-02.png

Although I still have to add the tasks in tasks.json if I want to define the default task addition to allowing VSCode to scan for problems.

Chart.js

March 09, 2017 - Søren Alsbjerg Hørup

In the past I have used D3.js and even Highchart.js for my charting needs. Today, I decided to tryout yet another Open Source alternative: Chart.js.

Chart.js is available through npm and @typings also exists for TypeScript fans such as myself:

npm install chart.js —save

npm install @typings/chart.js —save

Chart.js can be included with the script tag, CommonJs, ES6 and RequireJS. Although for HTML5 programming I always do the legacy route using script tag (I know.. I need to move with the tech).

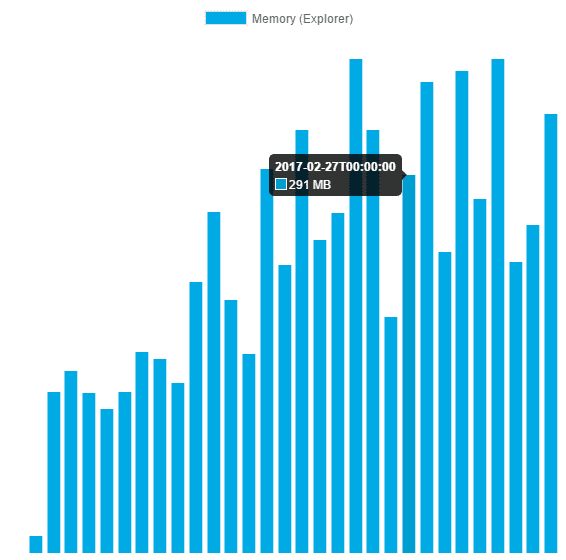
Chart rendering happens in a canvas, nothing fancy DOM manipulation which I really like, especially when working with ReactJS. The chart look and feel is very generic, nothing fancy here.

I really like the tool-tips though:

chartjs.png

Chart.js is also responsive, thus scaling to different screen sizes. I have yet to tryout this feature though. Apart from this, it supports animation, multiple axis, mixed chart types, and more.

8 chart types are provided out of the box. Definitely recommended.

Browser saveAs

February 24, 2017 - Søren Alsbjerg Hørup

The latest feature request required the ability to export the data contained within an HTML table to a file on the disk. To do this, I looked at the W3C Writer API: https://www.w3.org/TR/file-writer-api/

This API is not yet implemented in all browsers, and I thought that I had to look elsewhere. But then I found this: https://github.com/eligrey/FileSaver.js/ an implementation of the W3C standard usable by modern browsers.

Including FileSaver.js into my document allows me to call saveAs as if my browser natively supported. Saving some text to disk is as simple as making a Blob with the text content, correct mime-type and then calling saveAs:

let blob = new Blob("text", 
{
 type:"text/plain;charset=utf-8"
});
saveAs(blob, "exported\_text.txt");

Using this in TypeScript requires the correct typings for saveAs. I didn’t find them for this project, I simply declared saveAs as any type:

declare var saveAs;

Super easy, and verified to work on my PC using latest Chrome and IE :-)

PixiJS Interactive

February 21, 2017 - Søren Alsbjerg Hørup

Interacting with Pixi v4 objects, such as mouse clicks or taps, can be done by setting the interactive flag to true. The documentation related to Pixi v4’s interaction was a bit scarce - it took me some time to figure this out.

obj.interactive = true;

This instructs the Pixi engine that the object can be interacted with. It is then possible to attach even handlers to the object:

obj.on("mousedown", (e:PIXI.interaction.InteractionEvent) =>
{
});

Similarly, when on a touch-enabled device, one can attach touch events such as touchstart:

obj.on("touchstart", (e:PIXI.interaction.InteractionEvent)=>
{
});

I had some issues regarding PIXI.Graphics where my touch/click events would not be registrered. The issue was due to the hitArea being zero. Apparently, one has to manually set hitArea on a PIXI.Graphics instances:

graphics.hitArea = new PIXI.Rectangle(0, 0, width, height);

PixiJS is really simple to use when it comes to its interactive abilities.

Shared Modules between Node and Browser

January 25, 2017 - Søren Alsbjerg Hørup

I am currently prototyping a game built using TypeScript + Node. Node will host some REST API’s + act as HTTP server + act as WebSocket server. The HTTP server part will host a React frontend also built using TypeScript.

What I want is the ability to share TypeScript code between the two parts of the application.Typically, I have always used outFile when working with React in the browser, because I find it very easy to embed into my index.html. This approach is however not feasable on the server side (it can be hacked, but is ugly as hell), since the server needs to import modules from node_modules using the ES6/TypeScript import syntax.

TypeScript supports the ability to emit ES5 JavaScript code using different module types, such as AMD, systemjs, etc. For this project I have experimented in using modules on both the server and the client portion of my code.

My structure is as follows:

  • /client contains all client related .ts files
  • /server contains all my server related .ts files
  • /library contains all my shared .ts files

This setup allows me to easily import modules from library in either client or server:

import someClass from "../library/someClass";

/client and /server has their own tsconfig.json file which tells the compiler on how to emit JavaScript code. On the /client, I have specified that I want to emit ‘AMD’ modules while on the /server I want to emit commonJS used by node.

When building, I invoke tsc on both /client and /server, which will emit more or less the same JavaScript output but where the module format differs. In the browser, I can easily include the AMD module loader and load all my stuff. I can even concatenate the output of the client (for my own modules) using outFile if I make sure to manually load the output in the browser before passing everything to the AMD module loader.

On the server, Node can use commonJS and require to load my modules without any issue, since I built the node part using commonJS as module loader.

The only con I have found is that /library directory gets compile twice, which is OK in my book since we are talking about different run-time environments (node vs the browser).

I need to test this setup a bit more, and see if it scales as well as I hope!

Debugging *this*

January 22, 2017 - Søren Alsbjerg Hørup

I recently had some issues with vscode and its TypeScript debugger when trying to read the content of the this variable. The debugger printout of the value of a variable when hovering above the variable - but the this variable was undefined.

I believed it was my closures that were not correct, thus making me replace all my functions with fat arrows. This was however not the case, since the application ran perfectly in node.

The issue turned out to be that this was not correctly source-mapped to _this. Recall that this within a TypeScript class is compiled to _this such that calling context issues are avoided. The debugger however failed to grasp the concept, making the mouse-over fail.

One has to manually expand the Closure in the debugger tab in vscode and look for _this if within a fat arrow calling context.

Visual Studio Code and Source Maps

January 20, 2017 - Søren Alsbjerg Hørup

It has been some time since I last required vscode’s JS debugging functionality. Today I ran into an issue using the latest version of vscode + TypeScript source mappings. Specifically, my debugger was unable to find the TypeScript source thus unable to hit any breakpoints.

I have all my TypeScript source saved into the /src folder. tsc compiles and stores the result into the /bin folder along with source mappings between the .js files and the .ts files.

My debugger was unable to locate the source files, even when the js.map files contained the absolute path to my src folder.

Apparently, one has to add outFiles to launch.json with a correct path to the /bin folder for this to work. vscode cannot automatically detect the the presence of map files along the out .js files. This is a bit puzzling, since my launch.json contains the path to the JavaScript file I want to launch.

"outFiles": \["${workspaceRoot}/bin/\*\*.js"\]

This snippet did the trick for me.

And yes! I know that /bin might not be correct naming since JavaScript files are not binary :-)

Web.config Rewrite

January 18, 2017 - Søren Alsbjerg Hørup

Rewrite rules allow for rewriting an URL to another URI, e.g. accessing / can be rewritten as if the browser had access /abc. This is done on the server side, no 301 redirect is issued back to the client. This allows for prettier URLs.

A web project I am working on consist of a C# Web API 2.0 backend with a Javascript frontend. I wanted to keep all frontend stuff in the /Frontend folder while API stuff in the /Backend folder.

Looking from the perspective of the browser, I wanted that GET /api would rewrite everything to the C# Web API 2.0 backend, while GET / would rewrite everything to the /Frontend folder.

So when requesting e.g. /index.html, the server would rewrite the URL (behind the scenes) to /Frontend/index.html. Nice seperation IMO. This can be done from the Web.config file by writing two rules:

The first rule rewrites /api to /api and stops processing of further requests. This is needed such that the second rule is not processed.

The second rule rewrites /anything to /Frontend/anything, making it possible for me to save my frontend stuff inside the Frontend folder. Very nice indeed.

Visual Studio Code

January 10, 2017 - Søren Alsbjerg Hørup

Visual Studio Code (vscode) is an open source IDE by Microsoft built using Electron (Node.js + Blink + Desktop package). I have been using the IDE for several months now, specifically to develop my JavaScript and TypeScript projects.

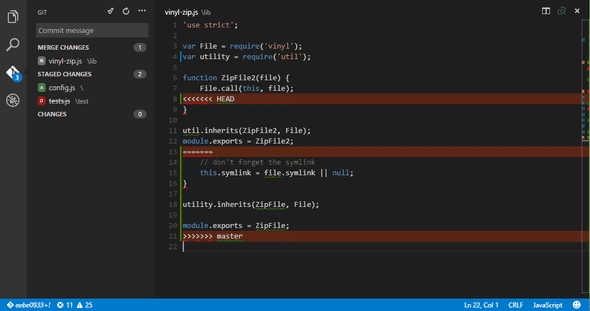
versioncontrol_merge

Out of the box the IDE comes with a extension management system, syntax highlight, IntelliSense for many languages and GIT integration.

A great feature of the IDE is the right click ‘Open With Code’ context menu where any directory can be opened in the IDE from Explorer. Project related stuff is saved in a .vscode folder within the directory.

The GIT integration just works. GIT integration in VS 2015 has always been a lackluster experience, although one can improve it by installing additional VS extension. No Subversion integration is provided out of the box, Subversion can be installed using the extension manager.

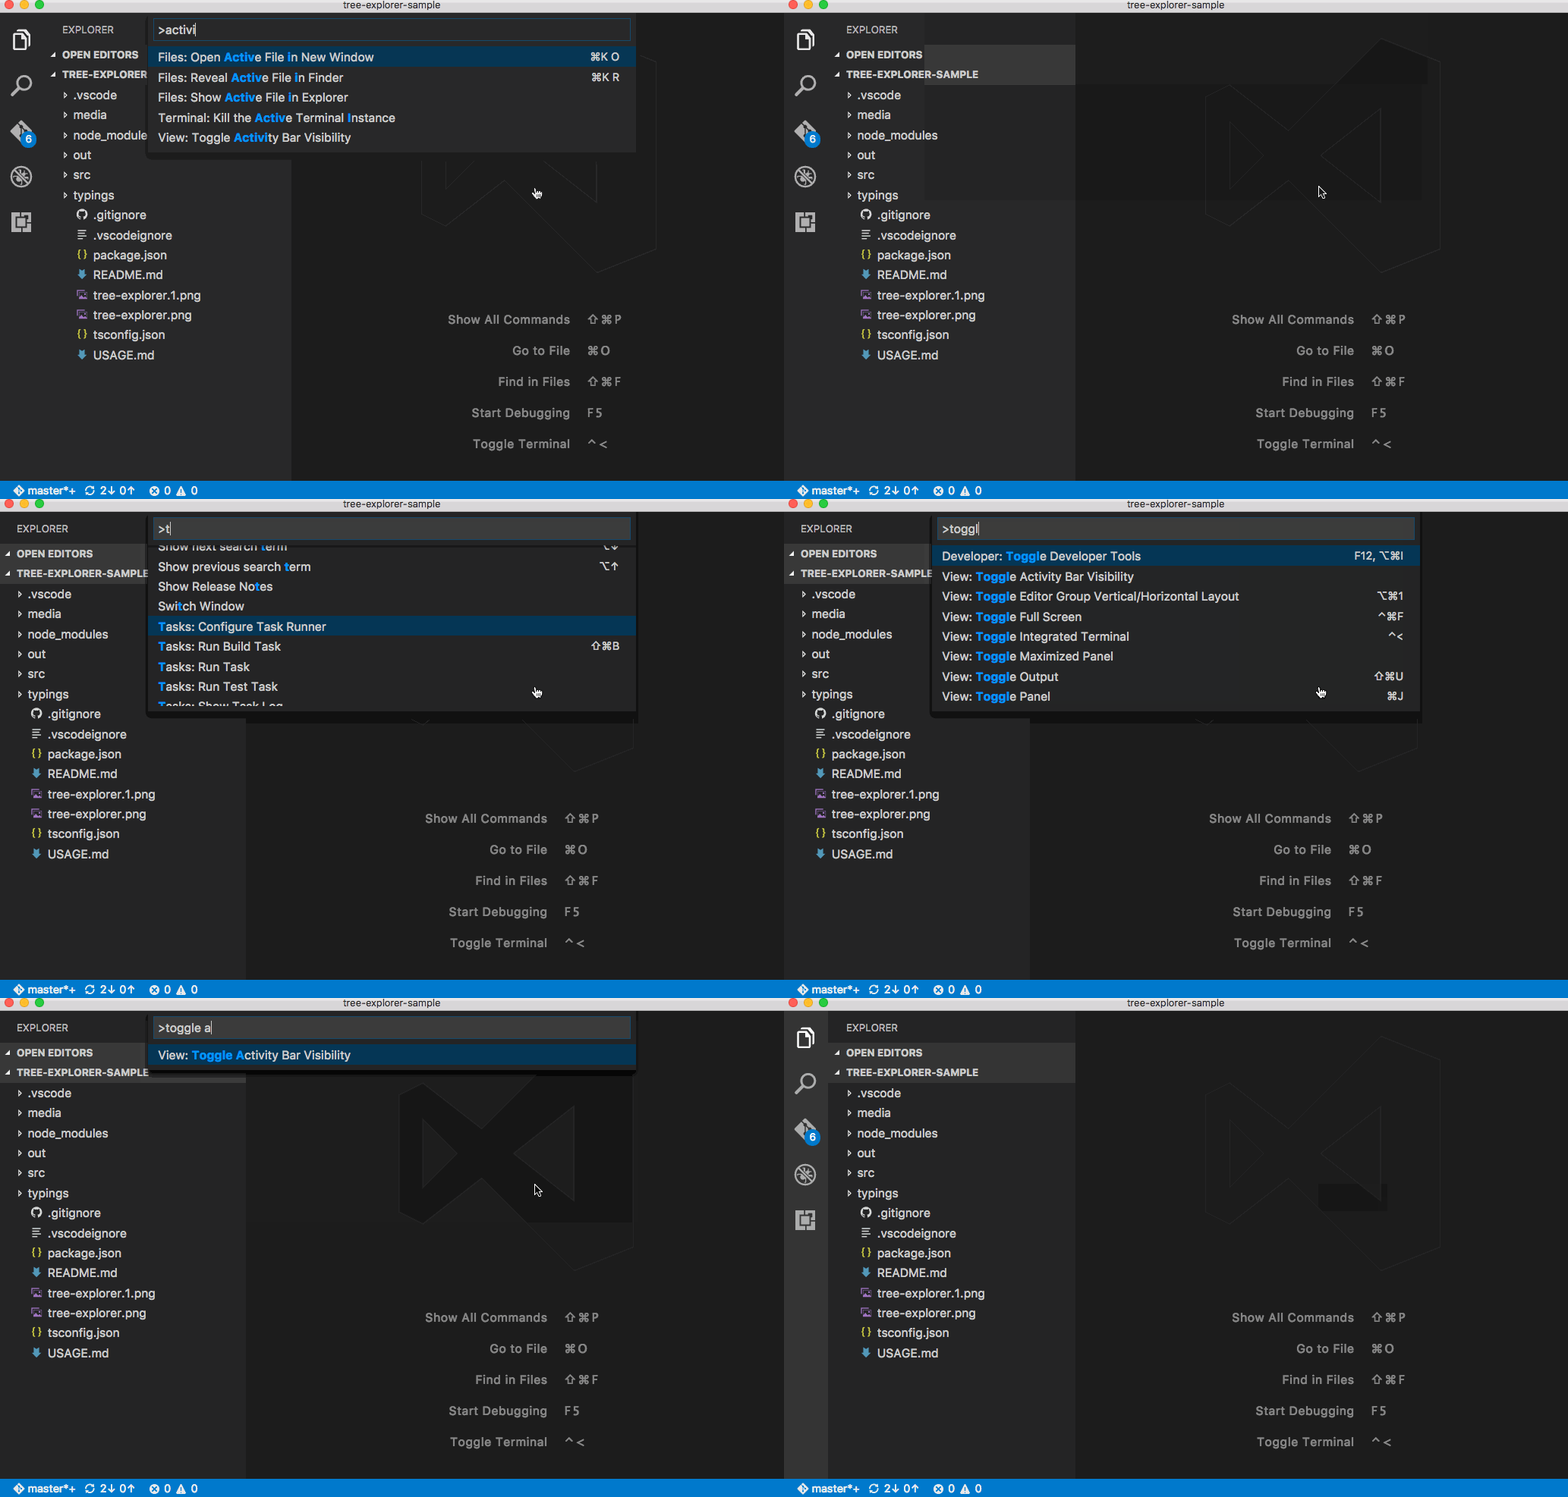
The IDE is frequently updated by Microsoft - atleast once a month a new update is pushed out. The Release Notes contains very detailed explanations of the changes and improvements in new versions and frequently contain GIF’s to show new features, such as this one from the November 2016 release:

1_8_hide-activitybar

Debugging is also supported. Different debug-engines can be installed allowing debug of many different kinds of applications, e.g. the Debugger for Chrome extensions allows debug of running javascript applications running in Chrome.

Even though vscode is more lightweight compared to VS, it takes the same amount of time (on my PC) to start each IDE. My guess is that the Electron framework takes a bit of time to initialize and compile the javascript that makes up vscode, while VS is more or less native binary code.

In any case vscode is really awesome to use and I can highly recommend it, at-least for web development using javascript, typescript, php, html, etc.

Create GUID using Visual Studio

January 07, 2017 - Søren Alsbjerg Hørup

Creating a GUID is very easy using Visual Studio. Tools->Create GUID shows the following Window:

image_2

Here it is possible to create a GUID represented in different formats. Typically I use option 5. when working on WiX installation projects and option 4. for any other type of project.